Wednesday, November 26, 2008

Boot System Commands

Boot System Commands

Router(config)#boot system flash image-name

Loads IOS with image-name

Router(config)#boot system tftp image-name172.16.10.3

Loads IOS with image-name from a TFTP server

Router(config)#boot system rom

Loads IOS from ROM

Router(config)#exit

Router#copy run start

Saves running-configuration to NVRAM. Router will execute commands in order they were entered on next reload


If you enter boot system flash first, that is the first place the router will go to look for the IOS. If you want to go to a TFTP server first, make sure that the boot system tftp command is the first one you enter.

Thursday, November 20, 2008

Configuration Example: VTP and Inter-VLAN Routing

Configuration Example: VTP and Inter-VLAN Routing

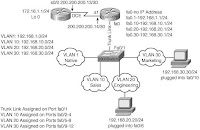
Figure A shows the network topology for the configuration of VTP and inter-VLAN routing. There are separate sections on configuring both 2900 and 2950 series switches.

Figure A. Network Topology for VTP and Inter-VLAN Routing Configuration


ISP Router


Router>en

Router>#config t

Router(config)#hostname ISP
Sets the host name

ISP(config)#no ip domain-lookup
Turns off DNS resolution to avoid wait time dur to DNS lookup of spelling errors

ISP(config)#line con 0

ISP(config-line)#logging synchronous
Appends the command line to a new lineno interruption from info items

ISP(config-line)#exec-timeout 0 0
Console session will never time out

ISP(config-line)#exit

ISP(config)#enable secret cisco
Sets the secret password to cisco

ISP(config)#int lo 0
Creates a loopback address for testing purposes

ISP(config-if)#description simulated address representing remote website

ISP(config-if)#ip address 172.16.1.1 255.255.255.0

ISP(config-if)#int s0/0
Enters serial interface configuration mode

ISP(config-if)#description WAN link to the Corporate Router

ISP(config-if)#ip address 200.200.200.13 255.255.255.252

ISP(config-if)#clock 56000
Sets the clock rate for the serial link

ISP(config-if)#no shut

ISP(config-if)#exit

ISP(config-if)#router eigrp 10
Turns on the EIGRP routing process

ISP(config-router)#network 172.16.0.0
Advertises the 172.16.0.0 network

ISP(config-router)#network 200.200.200.0
Advertises the 200.200.200.0 network

ISP(config-router)#no auto-summary
Turns off automatic summarization at the classful boundary

ISP(config-router)#exit

ISP(config)#exit

ISP#copy run start
Saves the configuration to NVRAM


CORP Router (1721 Router Running Cisco IOS Software Release 12.2(4)
These commands work also for the 1760 and the 2620/2621 series routers

Router>en

Router#config t

Router(config)#hostname CORP
Sets host name

CORP(config)#no ip domain-lookup
Turns off resolution to avoid wait time due to DNS lookup of spelling errors

CORP(config)#line con 0

CORP(config-line)#logging synchronous
Appends the command line to a new lineno interruption from info items

CORP(config-line)#exec-timeout 0 0
Console session will never time out

CORP(config-line)#exit

CORP(config)#enable secret cisco
Sets the secret password to cisco

CORP(config)#int s1

CORP(config-if)#desc WAN link to ISP Router

CORP(config-if)#ip add 200.200.200.14 255.255.255.252

CORP(config-if)#bandwidth 1544
Sets bandwith to 1544 kilobits for EIGRP calculation

CORP(config-if)#no shut

CORP(config-if)#exit

CORP(config)#int fa0

CORP(config-if)#full duplex

CORP(config-if)#no shut

CORP(config-if)#int fa0.1
Creates a subinterface

CORP(config-if)#no ip address
Ensures there is no IP address assigned to the interface

CORP(config-subif)#desc Management VLAN 1
Assigns a description to the subinterface

CORP(config-subif)#encapsulation dot1q 1 native
Enables Dot1Q encapsulation with VLAN 1 as the native VLAN

CORP(config-subif)#ip add 192.168.1.1 255.255.255.0
Assigns an IP address to the subinterface

CORP(config-subif)#int fa0.10
Creates a subinterface

CORP(config-subif)#desc Sales VLAN 10
Assigns a description to the subinterface

CORP(config-subif)#encapsulation dot1q 10
Enables Dot1Q encapsulation on VLAN 10

CORP(config-subif)#ip add 192.168.10.1 255.255.255.0
Assigns an IP address to the subinterface

CORP(config-subif)#int fa0.20
Creates a subinterface

CORP(config-subif)#desc Engineering VLAN 20
Assigns a description to the subinterface

CORP(config-subif)#encapsulation dot1q 20
Enables Dot1Q encapsulation on VLAN 20

CORP(config-subif)#ip add 192.168.20.1 255.255.255.0
Assigns an IP address to the subinterface

CORP(config-subif)#int fa0.30
Creates a subinterface

CORP(config-subif)#desc Marketing VLAN 30
Assigns a description to the subinterface

CORP(config-subif)#encapsulation dot1q 30
Enables Dot1Q encapsulation on VLAN 30

CORP(config-subif)#ip add 192.168.1.1 255.255.255.0
Assigns an IP address to the subinterface

CORP(config-subif)#exit

CORP(config)#router eigrp 10
Turns on the EIGRP routing process

CORP(config-router)#network 192.168.1.0
Advertises the 192.168.1.0 network

CORP(config-router)#network 192.168.10.0
Advertises the 192.168.10.0 network

CORP(config-router)#network 192.168.20.0
Advertises the 192.168.20.0 network

CORP(config-router)#network 192.168.30.0
Advertises the 192.168.30.0 network

CORP(config-router)#network 200.200.200.0
Advertises the 200.200.200.0 network

CORP(config-router)#no auto-summary
Turns off auto summari-zation

CORP(config-router)#exit

CORP(config)#exit

CORP#copy run start
Saves the configuration to NVRAM

Caution: Remember to advertise all networks. Advertising 192.168.0.0 does not advertise networks from 192.168.0.0192.168.255.0. These are separate classful networks, so they must be advertised separately, just like 200.200.200.0 is advertised separately.


2900 Series Switch

switch>en

switch>#config t

switch(config)#hostname 2900Switch
Sets host name

2900Switch(config)#no ip domain-lookup
Turns off DNS resolution to avoid wait time due to DNS lookup of spelling errors

2900Switch(config)#line con 0

2900Switch(config-line)#logging synchronous
Appends the command line to a new lineno interruption from info items

2900Switch(config-line)#exec-timeout 0 0
Console session will never time out

2900Switch(config)#exit

2900Switch(config)#enable secret cisco
Sets the secret password to cisco

2900Switch(config)#exit

2900Switch#vlan database
Enters VLAN database mode

2900Switch(vlan)#vlan 10 name Sales
Creates VLAN 10 with the name Sales

2900Switch(vlan)#vlan 20 name Engineering
Creates VLAN 20 with the name Engineering

2900Switch(vlan)#vlan 30 name Marketing
Creates VLAN 30 with the name Marketing

2900Switch(vlan)#vtp server
Makes the switch a VTP server

2900Switch(vlan)#vtp domain academy
Assigns a domain name of academy

2900Switch(vlan)#exit
Applies all changes to VLAN database and exits mode

2900Switch#config t

2900Switch(config)#int vlan1

2900Switch(config-if)#ip add 192.168.1.2 255.255.255.0

2900Switch(config-if)#no shutdown

2900Switch(config-if)#exit

2900Switch(config)#ip default-gateway 192.168.1.1

2900Switch(config)#int fa 0/1

2900Switch(config-if)#desc Trunk Link to CORP Router

2900Switch(config-if)#switchport mode trunk
Creates a trunk link

2900Switch(config-if)#switchport trunk encapsulation dot1q
Sets encapsulation to Dot1Q

2900Switch(config-if)#int fa 0/2

2900Switch(config-if)#switchport access vlan 10
Assigns a port to VLAN 10

2900Switch(config-if)#spanning-tree portfast
Transitions the port directly to the Forwarding state in Spanning Tree Protocol (STP)

Note: The command switchport mode access is not needed, because this is the default mode for interfaces. Use it only if the port was previously set to be a trunk link.

2900Switch(config-if)#int fa0/3

2900Switch(config-if)#switchport access vlan 10
Assigns a port to VLAN 10

2900Switch(config-if)#spanning-tree portfast
Transitions the port directly to the Forwarding state in STP

2900Switch(config-if)#int fa0/4

2900Switch(config-if)#switchport access vlan 10
Assigns a port to VLAN 10

2900Switch(config-if)#spanning-tree portfast
Transitions the port directly to the Forwarding state in STP

2900Switch(config-if)#int fa0/5

2900Switch(config-if)#switchport access vlan 20
Assigns a port to VLAN 20

2900Switch(config-if)#spanning-tree portfast
Transitions the port directly to the Forwarding state in STP

2900Switch(config-if)#int fa0/6

2900Switch(config-if)#switchport access vlan 20
Assigns a port to VLAN 20

2900Switch(config-if)#spanning-tree portfast
Transitions the port directly to the Forwarding state in STP

2900Switch(config-if)#int fa0/7

2900Switch(config-if)#switchport access vlan 20
Assigns a port to VLAN 20

2900Switch(config-if)#spanning-tree portfast
Transitions the port directly to the Forwarding state in STP

2900Switch(config-if)#int fa0/8

2900Switch(config-if)#switchport access vlan 20
Assigns a port to VLAN 20

2900Switch(config-if)#spanning-tree portfast
Transitions the port directly to the Forwarding state in STP

2900Switch(config-if)#int fa0/9

2900Switch(config-if)#switchport access vlan 30
Assigns a port to VLAN 30

2900Switch(config-if)#spanning-tree portfast
Transitions the port directly to the Forwarding state in STP

2900Switch(config-if)#int fa0/10

2900Switch(config-if)#switchport access vlan 30
Assigns a port to VLAN 30

2900Switch(config-if)#spanning-tree portfast
Transitions the port directly to the Forwarding state in STP

2900Switch(config-if)#int fa0/11

2900Switch(config-if)#switchport access vlan 30
Assigns a port to VLAN 30

2900Switch(config-if)#spanning-tree portfast
Transitions the port directly to the Forwarding state in STP

2900Switch(config-if)#int fa0/12
Save as Draft

2900Switch(config-if)#switchport access vlan 30
Assigns a port to VLAN 30

2900Switch(config-if)#spanning-tree portfast
Transitions the port directly to the Forwarding state in STP

2900Switch(config-if)# CTRL + Z

2900Switch#copy run start
Saves the configuration to NVRAM

2900Switch#


2950 Series Switch

switch>en

switch>#config t

switch(config)#hostname 2950Switch
Sets the host name

2950Switch(config)#no ip domain-lookup
Turns off DNS resolution to avoid wait time due to DNS lookup of spelling errors

2950Switch(config)#line con 0

2950Switch(config-line)#logging synchronous
Appends the command line to a new lineno interruption from info items

2950Switch(config-line)#exec-timeout 0 0
Console session will never time out

2950Switch(config-line)#exit

2950Switch(config)#enable secret cisco
Sets the secret password to cisco

2950Switch(config)#vlan 10
Creates VLAN 10

2950Switch(config-vlan)#name Sales
Defines the name of Sales

2950Switch(config-vlan)#vlan 20
Creates VLAN 20

2950Switch(config-vlan)#name Engineering
Defines the name of Engineering

2950Switch(config-vlan)#vlan 30
Creates VLAN 30

2950Switch(config-vlan)#name Marketing
Defines the name of Marketing

2950Switch(config-vlan)#exit

2950Switch(config)#vtp mode server
Makes the switch a VTP server

2950Switch(config)#vtp domain academy
Assigns a domain name of academy

2950Switch(config)#int vlan1
Creates the virtual VLAN 1 interface

2950Switch(config-if)#ip add 192.168.1.2 255.255.255.0
Assigns an IP address to the interface

2950Switch(config-if)#no shutdown

2950Switch(config-if)#exit

2950Switch(config)#ip default-gateway 192.168.1.1
Assigns the IP address of the default gateway

2950Switch(config)#int fa 0/1

2950Switch(config-if)#desc Trunk Link to CORP Router

2950Switch(config-if)#switchport mode trunk
Creates a trunk link

2950Switch(config-if)#int range fa 0/2 4

2950Switch(config-if-range)#switchport access vlan 10
Assigns ports to VLAN 10

2950Switch(config-if-range)#spanning-tree portfast
Transitions ports directly to the Forwarding state in STP

Note: The command switchport mode access is not needed, because this is the default mode for interfaces. Use it only if the port was previously set to be a trunk link.

2950Switch(config-if-range)#int range fa0/5 8

2950Switch(config-if-range)#switchport access vlan 20
Assigns ports to VLAN 20

2950Switch(config-if-range)#spanning-tree portfast
Transitions port directly to the Forwarding state in STP

2950Switch(config-if-range)#int range fa0/9 - 12

2950Switch(config-if-range)#switchport access vlan 30
Assigns ports to VLAN 10

2950Switch(config-if-range)#spanning-tree portfast
Transitions ports directly to the Forwarding state in STP

2950Switch(config-if-range)# CTRL + Z

2950Switch#copy run start
Saves the configuration to NVRAM


Monday, November 17, 2008

Inter-VLAN Communication: Router-on-a-Stick

Inter-VLAN Communication: Router-on-a-Stick

Router(config)#int fa 0/0

Enters interface mode for interface fa 0/0

Router(config-if)#no shut

Turns the interface on

Router(config-if)#int fa 0/0.1

Creates subinterface 0/0.1

Router(config-subif)#encapsulation dot1q 1 native

Assigns the native VLAN (usually VLAN 1) to this logical subinterface

Router(config-subif)#ip address 192.168.1.1 255.255.255.0

Assigns an IP address to the subinterface

Router(config-subif)#int fa 0/0.10

Creates subinterface 0/0.10

Router(config-subif)#encapsulation dot1q 10

Assigns VLAN 10 to this subinterface

Router(config-subif)#ip address 192.168.10.1 255.255.255.0

Assigns an IP address to the subinterface

Router(config-subif)# CNTL + Z


Router#


Thursday, November 13, 2008

Confirming VTP Configuration

Confirming VTP Configuration

1900 Series Switch

1900Switch#show vtp

Displays all VTP information


2900/2950 Series Switch

29x0Switch#show vtp status

Displays VTP domain status

29x0Switch#show vtp counters

Displays VTP statistics


Wednesday, November 12, 2008

VTP Configuration

VTP Configuration

1900 Series Switch

1900Switch(config)#vtp client ***Changes the switch to VTP client mode

1900Switch(config)#vtp server ***Changes the switch to default VTP server mode

1900Switch(config)#vtp transparent ***Changes the switch to VTP transparent mode

1900Switch(config)#vtp domain CNAP ***Sets the name of the VTP management domain to CNAP

1900Switch(config)#vtp password cisco ***Sets the VTP password to cisco

2900 Series Switch

2900Switch#vlan database ***Enters VLAN database mode

2900Switch(vlan)#vtp client ***Changes the switch to client mode

2900Switch(vlan)#vtp server ***Changes the switch to server mode 2900Switch(vlan)#vtp transparent Changes the switch to transparent mode

2900Switch(vlan)#vtp domain academy ***Sets the name of the VTP management domain to academy

2900Switch(vlan)#vtp password catalyst ***Sets the VTP password to catalyst

2900Switch(vlan)#vtp v2-mode ***Sets VTP mode to version 2

2900Switch(vlan)#vtp pruning ***Enables VTP pruning

2900Switch(vlan)#exit ***Applies the changes and exits mode

2900Switch#

2950 Series Switch

2950Switch#config t ***Enters global config mode

2950Switch(config)#vtp mode client ***Changes the switch to client mode

2950Switch(config)#vtp mode server ***Changes the switch to server mode

2950Switch(config)#vtp mode transparent ***Changes the switch to transparent mode

2950Switch(config)#vtp domain academy ***Sets the name of the VTP management domain to academy

2950Switch(config)#vtp password catalyst ***Sets the VTP password to catalyst

2950Switch(config)#vtp v2-mode ***Sets VTP mode to version 2

2950Switch(config)#vtp pruning ***Enables VTP pruning

Note:
VTP versions 1 and 2 are not interoperable. All switches must use the same version. The biggest difference between version 1 and 2 is that version 2 has support for Token Ring VLANs.

Caution:
Switches that are in client mode update their VLAN database from switches that are in server mode. If you have two or more switches interconnected and you delete a VLAN database, you may find that it becomes updated from a server switch because of your VTP mode.
Another serious problem occurs when you take a new switch in server mode (the default mode) and plug it into an existing network. If the VTP revision number is higher on the new switch, it sends an update to all other switches to overwrite their VLAN database with new informationin this case, an empty VLAN database. You now have a production network with no VLAN information.
Recommended practice is that you put a switch into VTP client mode before adding them into a production network, allow it to receive an update of current VLAN information, and then change it to VTP server mode.
Tuesday, November 11, 2008

Verifying Trunking

Verifying Trunking

1900 Series Switch

1900Switch#show trunk A

Displays trunking information about port 0/26

DISL state: On, Trunking: On, Encapsulation type: ISL

1900Switch#


2900 and 2950 Series Switches

29x0Switch#show int fa 0/1 switchport

Shows the status of the interface, including trunking information

Name: Fa0/1

Switchport: Enabled

Administrative mode: trunk

Operational Mode: trunk

Administrative Trunking Encapsulation: isl

Operational Trunking Encapsulation: isl

29x0Switch#

Monday, November 10, 2008

Password protect web folder

Apache authentication can be configured to require web site visitors to login with a user id and password. This is different than adding a login form on a web page and creating your own authentication. This tutorial describes the various methods available for authentication with Apache and its' configuration. Login protection is applied to the web pages stored in a directory. The login dialog box which requests the user id and password is provided by the web browser at the request of Apache. Apache allows the configuration to be entered in its' configuration files (i.e. main configuration file /etc/httpd/conf/httpd.conf, supplementary configuration files /etc/httpd/conf.d/component.conf or in a file which resides within the directory to be password protected.

Apache password file authentication:

Directory protection using .htaccess and .htpasswd

This tutorial applies to Apache based web servers. It requires:

1. Editing the server configuration file (httpd.conf) to enable/allow a directory structure on the server to be password protected. Basically the default access permission statement need modification.
2. The creation and addition of two files specifying the actual logins and passwords. (.htaccess and .htpasswd)

Use this sparingly because Apache will have to check all directories and subdirectories specified in the configuration file for the existence of the .htaccess file adding to a servers latency.

When trying to access a file in a protected directory, the user will be presented with a window (dialog box) requesting a username and password. This protection applies to all sub-directories. Other .htaccess files in sub directories may respecify access rules.

Apache authentication uses the modules mod_auth and mod_access.

Apache configuration file:

File: /etc/httpd/conf/httpd.conf (older systems used access.conf)

Default: This disables the processing of .htaccess files for the system.


AllowOverride None


or for a specified directory:


AllowOverride None


Change to and/or specify directory to protect:


AllowOverride All


OR


AllowOverride AuthConfig


AllowOverride parameters: AuthConfig FileInfo Indexes Limits Options

The name of the "distributed" and user controlled configuration file .htaccess is defined with the directive: (default shown)

AccessFileName .htaccess

Password protection by a single login:

Password files:

1. Create the directory you want to password protect (example: membersonly)
2. Create a file /home/domain/public_html/membersonly/.htaccess in that director that looks something like this:

AuthName "Add your login message here."
AuthType Basic
AuthUserFile /home/domain/public_html/membersonly/.htpasswd
AuthGroupFile /dev/null
require user name-of-user


In this case the "name-of-user" is the login name you wish to use for accessing the web site.

[Pitfall] The literature is full of examples of the next method but I never got it to work.

One can use Apache directives to specify access and restriction:

AuthName "Add your login message here."
AuthType Basic
AuthUserFile /home/domain/public_html/membersonly/.htpasswd
AuthGroupFile /dev/null
require user name-of-user


Also see: List of Apache directives. If an incorrect directive is used in the .htaccess file it will result in a server error. Check your log files: /var/log/httpd/error_log.
The name of the access file .htaccess is specified by the httpd.conf directive AccessFileName.

3. Create the password file /home/domain/public_html/membersonly/.htpasswd using the program htpasswd:

htpasswd -c .htpasswd name-of-user


Man page: htpasswd

Example file: .htpasswd

user1:KgvCSeExtS4kM
USER1:KgvCSeExtS4kM
User1:KgvCSeExtS4kM


Flexible password protection by group access permissions:

This example differs from the previous example in that it allows for greater control and flexibility by using groups.

Password files:

1. Create a file .htgroup in that directory that contains the groupname and list of users:

member-users: user1 user2 user3 ... etc


Where member-users is the name of the group.

2. Modify .htaccess in the membersonly directory so it looks something like:

AuthName "Add your login message here."
AuthType Basic
AuthUserFile /home/domain/public_html/membersonly/.htpasswd
AuthGroupFile /home/domain/public_html/membersonly/.htgroup
require group member-users


3. Create the password file .htpasswd using the program htpasswd for each user as above. You don't need the -c option if you are using the same .htpasswd file. (-c is only to create a new file)

htpasswd -c /home/domain/public_html/membersonly/.htpasswd user1
htpasswd /home/domain/public_html/membersonly/.htpasswd user2

Restrict access based on domain or IP address:

Allow specified domain to access site:

Order deny, allow
Deny from all
Allow from allowable-domain.com
Allow from XXX.XXX.XXX
Deny from evil-domain.com

Specify first three (or one, or two, ...) octets of IP address defining allowable domain.


Placing Authentication directives in httpd.conf exclusively instead of using .htaccess:

The purpose of using the "distributed configuration file" .htaccess is so that users may control authentication. It can also be set in the Apache configuration file httpd.conf WITHOUT using the .htaccess file. This can improve server performance as the server will not have to look for the .htaccess file in each subdirectory.

File: httpd.conf (portion)

..
...


AllowOverride AuthConfig
AuthName "Add your login message here."
AuthType Basic
AuthUserFile /home/domain/public_html/membersonly/.htpasswd
AuthGroupFile /dev/null
require user name-of-user


...
..